Design a Form
We will create a form to continue the development of our Travel Request app. You will use forms to acquire data and store it on the server. Follow the steps on this page to create your first form.
- Step 1: Access the App Composer page. You're already on the App Composer page if you just designed your first app.
- Step 2: Create a new form using the + button on the Form Builder column.
- Step 3: Now, you will enter the form details, including:
| Field | Description | Value for this example |
|---|---|---|
| Form ID | A unique identifier. | travelRequestForm |
| Form Name | A unique descriptive name. | Travel Request Form |
| Table Name | The database table name to store the form data. | travel_requests |
| Description | Describes the form functionalities and purpose. | Travel request form used as example on the app creation process. |
Forms sharing information
Different forms can share data by pointing to the same table name. You can use this functionality to create comprehensive tables to be used as a database.
- Step 4: Click Save to create the form. As a result, the Form Builder will be launched.
- Step 5: Create a Section. By clicking on the Section, you can change its Label and ID. After, click Apply Change to save your modifications. Use the following Label and ID.
| Field | Description | Value for this example |
|---|---|---|
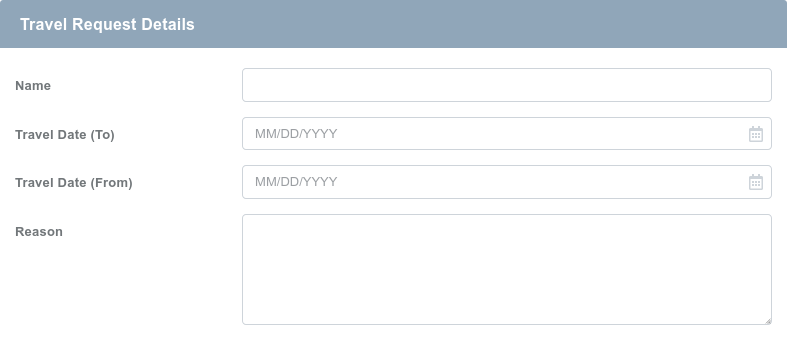
| Label | A unique descriptive name. | Travel Request Details |
| ID | A unique identifier. | travel_request_details |
Label and IDs
When renaming sections or form fields, Joget will suggest IDs based on the provided Label. You can accept them or change to one that best fits your needs.
- Step 6: Customize the Form. Use the left panel to add fields of different types into your Form by dragging and dropping them into one section. You can modify the Label and ID for each new field included in your new Form by selecting the desired field. For this example, add the following fields with the respective configuration:
| Field type | Label | ID |
|---|---|---|
| Text field | Name | name |
| Data Picker | Travel Date (From) | travel_date_from |
| Data Picker | Travel Date (To) | travel_date_to |
| Text Area | Reason | reason |

- Step 7: Click Preview to check how the form looks.
- Step 8: Click Save when you finish creating the form.
The video below provides a visual representation of the steps mentioned previously.
You've successfully designed a form. Your next step is to design a new list.